Search


Friday, September 19, 2014

Social Media – Adjusting My Settings


This week I have been mulling over the role social media plays in daily life. I don’t mean the silly quizzes that we all take….even if we don’t admit to taking them. I don’t mean the oddly addicting games…..or the sensationalized fake new stories.  What do I share?  How do I share it?  What do I learn?

This week I had an issue with a local businessman who has very poor customer service and a bad attitude towards customers.  Without listing specifically who or getting into the specifics of why, I posted asking for some recommendations for alternate providers.  Within an hour, I had more than enough recommendations and info.  I’d also called all the alternative service choices.  I posted the costs I’d found in the comments and several other people replied that they were making the switch too.  Without openly trashing the local business, I’d affected a change in my own life, saved money, and helped several more customers find company that will hopefully treat us better and not take for granted that being a local business means that the locals will just blindly stay with you out of loyalty. My post was set so that only Friends could see it….not Friends of Friends.

Later that day, I got a friend request from the local businessman….and it quickly disappeared.  I’m assuming he’d been looking at my FB page to see if I’d posted anything about him.  When he couldn’t get information that way, he had a friend of a friend contact me to ask me what was going on…..at least I’m assuming that’s what the “random” question out of nowhere was from someone I don’t talk to that much was.  I was just straightforward and factual saying that towards me, the customer service had been poor and that he didn’t seem to appreciate the customers he had very much.  I worked hard to answer truthfully without trashing him to his friend……knowing full well that the mutual friend would be reporting back.

Several weeks ago, I saw a person who had had a bad experience with a local business publicly flame them and trash them.  It is a business that I do business with….and I like and respect the owner.  It was hard to see negative comments about something I support.  But, rather than get into an argument with that person on the negative post, I posted positive comments and a groupon on my own wall, and changed who could see those particular posts to exclude the person who was on a trash and burn mission.  We have mutual friends in common. Several of my FB friends chose to give the local business some new business.  Maybe some left because of the flaming….though I don’t think so.  But, I know some joined because of the positive comments and groupon.

Another thing I saw this week was an ex-spouse post an open letter to the other ex.  It was a train wreck waiting to happen.  The original poster felt that posting it was “fine” because it was about feelings…..which should make it all OK.  The poster had it set so that friends-of-friends could see it.  Friends of mine noted the debate going on when I offered the VERY unpopular onion that it wasn’t an appropriate way to share feelings of this sort.  The original poster…and supporters…. maintained that it was OK to post negative comments that should be private because it was all “feelings.” Inevitably, the other shoe dropped and the other ex got wind of it and responded heavily. The train wreck happened…..with the original poster crying….SEE how I get treated?????

I went through my own VERY traumatic situation with my older child.  During that time period, I kept most if not all of the situation to myself.  I talked to my close friends and my family.  We never sat next to each other at soccer games or school plays…..and we had separate but equal meetings during teacher conference week.  But, we never put the laundry out to air in our community.  Most people always commented and complimented how well we got along.  They never saw the behind doors nasty emails and phone calls.  The custody suit that dragged on.  The lawyers.  The mediators.  I kept to myself that they even had the gall to file for custody (which they lost).

Watching this interaction made me question…..what WOULD I have done had social media available when I went through that with my child.  My sisters tease me that I post too much.  Some days, that is true. But, would I have posted about the deeply private situation and the mess we lived through???  Could I really have walked the talk that I’d just preached to my FB acquaintance????

I spent some time yesterday talking about that with my husband and he reaffirmed for me that…..No….I wouldn’t have posted inflammatory statements and barbs and jibes.  I would have done just what I did…..limit the conversation and the info to a few close friends and keep the private stuff just that…..private.

But, what is private?  How do we adjust our settings….internal and external…to limit what we share? That’s something each person has to figure out and decide Every person makes their own choices and no one setting is right for everyone.

In-person conversations, when meaning and intent are clear, I’ll tell you most anything you’d like to ask about.  In a private email or FB message…..maybe a little less.  It’s too easy for tone to be misread. Also, it’s very easy for someone to use the written words accidentally in a way that you don’t intend them to be used.  On my FB wall…..even less.  I will post about day to day stuff…..but I’m not going to get into the fight I had with my husband last week.  He deserves more from me than that (and no….we didn’t actually have a fight last week.) 


Those are my settings for social media.  I may slip up every now and again, and I will probably always be changing and adjusting them.

Monday, July 7, 2014

Roadside BBQ Chicken

A few months back, we were driving home from the shore and passed a roadside BBQ chicken sale at a gas station.  I don't know if they do this at other places, but here....roadside/gas station BBQ chicken is AWESOME.  However, money is tight and  it costs about $15 for a platter......1/4 chicken, corn, bp, and some kind of bread.

So, I didn't even suggest it....but started using my smart phone to look for ideas.  I ended up combining a few and came up with something that is just gosh darn awesome and a pretty good approximation.

I have made it 4 times since that day.  My husband and I argue over the leftovers. I can't say that the photo does it justice, but it is finger-licking bunches of yum...and I took the photo after we ate 2 of the 4 breasts.


Roadside BBQ Chicken

Mix together the following:

  • 2 cups white vinegar
  • 1/2 cup Worcestershire sauce (for this I use store-brand because of the volume/cost thing)
  • 2 tbsp brown sugar
  • 1 tbsp celery seed
  • 1 tbsp garlic powder
  • 1 tbsp onion powder
  • 2 tbsp salt
  • 1 tsp black pepper
  • 1 tbsp hot sauce (sriracha, Frank's, whatever you like)
Divide this in half (probably a little over a cup and a quarter is half.

Put of of the halves in a seal-able bag with 4 whole (bone-in, skin-on) chicken breasts.  Let marinate for at least 2 hours.  I try to go for much longer.....like 6-8 hours.

To the other half, add 1/2 cup oil and save for basting.

After marinading, put the grill on high (we have a gas grill, so that's all the grilling info I can share). Wait 15 minutes, then put the chicken on skin side down and turn down to medium.  After 15 minutes, whisk the oil into the reserved liquid and baste the chicken, then flip it over (bone-side-down).  Keep it that way for the remainder of the cooking, basting every 15 minutes until the internal temperature is at lease 165F.  It takes about an hour.

If you want, you can baste the entire thing with a BBQ sauce of your choice for the last 5 minutes and flip so both sides get the sauce charred on.

Let the meat rest for 10 minutes after removing from the grill. 

Eat and enjoy!


Thursday, July 3, 2014

For my husband on our 10th anniversary

Tomorrow....on July 4th..... my husband and I will celebrate 10 years of marriage....and almost 14 years since we met.  While I truly feel that the day we met is the day our lives changed.....him putting up with me for 10 years legally warrants a HUGE recognition.

We got married on the 4th of July because the places we booked offered a discount, and on a Sunday we could have a Catholic ceremony without a full mass.  We joked...and still do....that we would always have our anniversary off.....someone would be having a party.....and there would always be fireworks.

After we booked the date, we realized that the colors I'd chosen were red....white...and.....blue.  Not on purpose.  My dress was white with red roses embroidered on it.....and the lot of bridesmaid dresses I'd gotten were navy blue.

For me, our wedding was magical.  The day was hot, no family members killed each other, we could see the fireworks from the reception, and the "worst" thing that happened was that we were locked out of both of our cars and had to borrow clothing and toothbrushes....and had no clothing on our wedding night or the morning after.

The past 10 years have been nothing like I expected.....nothing I imagined.....and exceeded anything that ever crossed my mind.  There have been ups and downs, but I wouldn't change a moment.

So, for my sweet, wonderful, amazing husband.......

Ten Things from Ten Years

  1.  Our story is always being written and re-written. Who we are together and for each other changes from one day to the next…..from one week to another….and from year to year and beyond. Sometimes we even change from one minute to the next.
  2. You know when to let me be “right”….and how to tell me when I’m wrong.
  3.  In addition to being the great stepdad I thought you would be….you are a great father.
  4.  At the end of the day, our differences make us stronger together than our similarities. Together we are stronger than the sum of our parts.
  5. We should never work on the same part of the same project together at the same time. We make a great team in the end, but the bits in the middle are sometimes worked out better separately
  6. While we have some major philosophical differences, we agree on the most important…and they are what binds us together.
  7.  A sense of humor is key…..not only for helping to get over the rough parts, but to help us feel “together.” You are the second funniest person I know (me being the first…..as long as I’m laughing, it’s all good).
  8.  I am married to my best friend….and my other best friend approves.
  9.  You calm me and center me in a way that I never was…and never could be….without you.
  10. 10 years of marriage….and almost 14 years together…..we still make other people nauseated. I am proud of that fact.
I I love you.  I love our life.  I love our family.


Tuesday, May 13, 2014

Great spice rub

A couple of years ago, I came up with a spice rub that my family loves on pretty much any type of protein.  I generally mix it up in a large batch and then rub it over whatever meat or fish I'm cooking.  The sugar in it helps to caramelize the protein and provide a good sear. It works for grilling and for pan cooking.

1/4 cup sugar
2 Tbsp smoked paprika
1 Tbsp onion powder
1 Tbsp garlic powder
2 tsp salt
1 tsp pepper

Mix....rub......and mmmmm.

Friday, July 19, 2013

Tuscan White Beans

This week I have been reading A Thousand Days in Tuscany: A bittersweet adventure.


The jury is still out on the book for me.  It is very descriptively written...filling my mind with scenes and food imagery. At the end of every chapter, there is a recipe.

About a third of the way through, I found a recipe for some Tuscan white beans.  In the book and the subsequent recipe, they cook the beans in a bottle in the ashes of a wood fire all day.  However, that basically will never happen in my lifetime here.  I love to cook, but I'm not that dedicated to the authenticity of the whole thing.

But, after reading through it, I figured out a way that I could make it work with some changes to their recipe and some changes to the cooking method.

I made it today and the smell in the house was flat out amazing.  The beans were part of tonight's dinner and they frankly blew me away.  The ingredients were so simple, but the flavor was outstanding.  

I served the beans over some Italian bread...torn into chunks...and had some prosciutto to go with the whole Italian theme in my head. 

Tuscan White Beans
  • 1 lb dried beans
  • water
  • 2 teaspoons salt
  • few grinds of pepper
  • 1 tablespoon rosemary
  • 1 teaspoon sage
  • 4 cloves of garlic crushed
  • 1 cup olive oil
  • 1-1/2 cup white wine
Start by soaking the beans.  I use the quick-soak method ....cover with cold water, cover pot, bring to a boil, turn off, leave covered for 1 hour, drain, rinse.  Or, you could cover with water and soak overnight.

After the beans are presoaked, put in pan and cover with fresh water.  I use a pressure cooker for this.  With the pressure cooker, you lock the lid on, bring it to pressure, reduce heat, cook for 10 minutes, release the pressure, drain, and the beans are ready to season.  If you don't have a pressure cooker, you can put in any pan, cover with water and cook covered for an hour or so until the beans are tender.  Both ways work equally well, the pressure cooker is just super quick.

I then put the beans in my slow cooker; added the salt, pepper, rosemary, sage, garlic, white wine, and olive oil; and cooked on high for 4 hours. And done!!!!!

If you don't have a slow cooker, you could just drain the beans (again); add in the seasonings, wine, and olive oil; add in 2 cups of water (you'll need more moisture cooking on a stovetop); and cook covered on the stove top for 1-1/2 hours.

Simple ingredients.....amazing taste.

Monday, July 8, 2013

Homemade Chicken Stock in a Slow Cooker

I use my slow cooker for TONS of things. One of the really cool things I found is that you can use it to make homemade chicken stock.

It’s super easy to do and the difference is amazing. While I certainly don’t use homemade chicken stock for everything, it’s a really nice thing to be able to do with leftovers and it really ups the recipe results when I do.

Last week I made some using the leftovers from a store-bought rotisserie chicken that I had picked up for a quick dinner.

Clean most of the meat off the chicken. Save the bones. If you can’t/don’t want to do the stock right away, put the bones in a bag in the freezer until you are ready.

Put in slow cooker.  Add a peeled and quartered onion, 2 or 3 peeled carrots, and some peeled garlic cloves.  I can’t stand celery, so it’s never in my house, but you can add a few stalks of that too. Cover with water.  


Cover slow cooker and cook on low for 6—8 hours.  It will look something like the photo below. Note the difference in the deeper color to the liquid and the "cooked" look to the vegetables, etc.


When done, cool just until you can handle the crock insert. Strain the liquid. I line my colander with paper towels (see below) and slowly pour it through.
  

I stop occasionally to discard the solids that stop the liquid from flowing through. Replace the paper towels and re-strain a second time.

At this point, you can chill the whole container to skim the fat off the top, or just leave it in.  As you can see, there isn't a ton of fat in it. Just that small rim at the top.


Add salt to taste. Super important. Will taste horrible without adding salt.

The color of homemade stock is amazing.  Just look at that photo above and the one below.  It looks NOTHING like the watery yellow stuff that comes from the can, cube, or powder.  And the flavor is above compare.

I divide it up into small bags with 1 cup in each bag and freeze it. Then when I need some for a sauce or recipe, I just thaw it and use.

Try it.....you'll be impressed with your cooking prowess.


Tuesday, July 2, 2013

Local Fun Things to Do

In the last several weeks, school has ended.

This is the first year that my little guy was in school full-day…5 days a week.  I have MISSED him terribly. So, the last several weeks, we have been bonding again.  Snuggling, holding hands, playing games, etc.

But, I don’t want to just let his summer slip by without having a ton of fun.  To that end, I came up with a list of local free or low cost activities for us to do. After I did, I saw a list going around of 50 fun things to do in Philly.  There is some overlap between my own list and their….but I swear I didn't copy. I came up with more than 30 things on my own.

Some of the things I have chosen, are based on a few memberships that I have.  When I pick a membership, I look at the cost and what the reciprocal memberships are.  A perfect example of this is the Delaware Museum of Natural History.  They offer reciprocals at 4 VERY local places that we would have a good time at…including the “dinosaur” museum in Philly.  Make sure you read the fine print.  Does the reciprocal membership offer free admission or do you have to pay 50% of the entrance fee.  Are there any restrictions like day of the week or the distance from the reciprocal museum to the residence on your ID?  Are you limited to number of children you can bring?  Because I have an only child and I usually am watching one of my friend’s children, I always add a second child on when I fill out the membership.  That way I’m not charged for the favor I am doing my friend…but we’re still having fun.


All that said here’s the list that I came up with.  If you have any other suggestions, let me know.  I could use a few more!!!

Foot tour of Philly – pay what you want
Taylor Arboretum – let kids play in creek
Tyler Arboretum – treehouses and picnic (have membership)
Brandywine zoo – get in with Elmwood Park Zoo membership
Elmwood park zoo – have membership
Hagley Museum – get in with DMNH membership
Iron Hill Museum – get in with DMNH membership
Lego building competition
PJ/Movie day
Go to Statue of Liberty – request from the little guy
Day trip to the shore
Make s’mores
Catch fireflies
Scavenger Hunt/hike
Let kids pick a recipe and teach to make it
Learn to play piano
Go to Please Touch Museum (bought groupon)
Camp out in back yard
Academy of Natural Sciences - get in with DMNH membership
Have lunch at Philly food cart

Sunday, June 16, 2013

My Thoughts on Father's Day and Fatherhood

I have two sons.....ages 21 and 7.  They have different fathers.

I had my first son about 15 months after my mother died.  There is a definite correlation.

His father and I had very little to nothing in common.  I rebounded from my mother's death into the wrong relationship and I have a child.

I WOULD NOT CHANGE ONE THING about the whole situation.  But 21 years later, I'm able to see where I went and why.

My son was lucky and his father met his current wife when my son was 5.  They are still together and have been a positive situation for him for most of his life.

When my son was 8, I met the love of my life.

I never really let my son spend time with people I dated.  I didn't want him to have a string of men running through his life.

When I met "the one," I knew the difference right away.  Three months after we met, my now-husband met my son.  This morning we were smiling in remembrance of how the 8-year-old boy met the man that became his step father.  He first introduced himself....then his favorite character necklace he was wearing.  I still have the necklace and we all still have the memory.

That night....after the introduction, we ate pizza.....watched an episode of Double Dare that my husband was in when he was a teen...and went to see Christmas lights at a local arboretum.

From there on out, the rest is our family's history. My husband is a wise man and he allowed the relationship with my son to develop on its own.

We got engaged a year and 3 months later.....married a year after that.

A year and six months after we were married, we had another child....together.

Both my boys love each other.  Both of them love my husband endlessly.

Today, our grown boy called his step dad to wish him happy father's day.  I did not nudge.  I did not text.  I did not nag.  He did it on his own....because of the relationship they made together.

So, on Father's Day....maybe it's not all about biology.  Sometimes it's about chemistry and good old fashioned engineering and hard work.


Friday, May 31, 2013

Behind the curve


Somehow Holiday weekends always make me feel like I am behind the curve.  Kind of like a horse watching the race from the starting gate.....and the race is almost over.

So much of my mental well-being depends on me getting myself together.....laundry....meals.....grocery shopping.

If those aren't done, I feel incomplete and just plain behind.

So, Monday....we came home from a long weekend away with my sisters and their kids.  Had a wonderful time.  Wouldn't trade a moment for anything.  LOVED it all....nieces doing girl stuff....nephews doing boy stuff (at both ends of the range)....and my children mixing with their cousins the way my sisters and I did when we were kids.

Bonds made to span a lifetime.

Cannot wait for August when we get 2 whole weeks together....annoying each other.....bonding......living......and learning.

But, back to this week.  I optimistically started laundry when we got home Monday night.  There is currently a load in the washer and one in the dryer....with two more to start.  NOT my usual "get it done on Monday" groove.

I finally did my menu on Tuesday afternoon.  There is a heat wave coming this week....which means getting into "summer cooking"......trying to keep the extra heat in the house to a minimum when it's hotter (i.e., during dinner time).

And here I am on Thursday night/Friday morning finally getting my menu posted.  It's always there....even if it's not posted.


Tuesday - baseball (ended up getting rained out...so good day for the stew)
Cranberry orange pork stew....I do it in the slow cooker.  Sear off the pork cubes in a pan.  Then make the sauce in the pan....bring to a boil and dump it over the pork in the slow cooker

Wednesday
Picnic all-star pasta salad with grilled chicken - new Cooking Light recipe.....with a homemade pasta salad dressing added (it was a hit) - it had pasta, red peppers, corn, red onion, bacon, avocado, chicken, fresh mozzarella, and a honey lime vinaigrette

Thursday – soccer practice
Thai steak salad – new Cooking Light recipe (also a hit)

Friday - baseball 
Spicy grilled shrimp with quinoa salad – also a new Cooking Light recipe

Saturday – baseball
New burgers with roasted potato salad

Sunday
Grilled pork chops with avocado corn salsa and baked potatoes

Monday, May 20, 2013

Start of summer weekend!!!!! - Monday's menu

This week we are starting the little guy on a more advanced soccer team....and so begins the two-times a week practice.  I'd forgotten how it changes everything.  We are also headed "down the shore" with my sisters and their families...our house here will be fully occupied by our now-21-year-old and his friends.

Here's this week's menu....designed to make 14 people happy over the weekend....all with dietary issues and restrictions.  SIGH.

If you need ideas, check out orgjunkie.com.


Monday
Black bean burritos – with queso fresco

Tuesday – soccer practice
Take grown man/boy out to dinner to celebrate his birthday

Wednesday

Thursday – soccer practice

Friday – heading to shore
BBQ chicken and rice - a meal my mom made for us when we were kids...she tore it out of a magazine ad for Kraft BBQ sauce in 1970-something

Saturday – beaching it
Spaghetti meatballs garlic bread and bag salad

Sunday - still hanging with the fam in the sand
Burgers, BP, garlic corn, and baked beans


Thursday, May 16, 2013

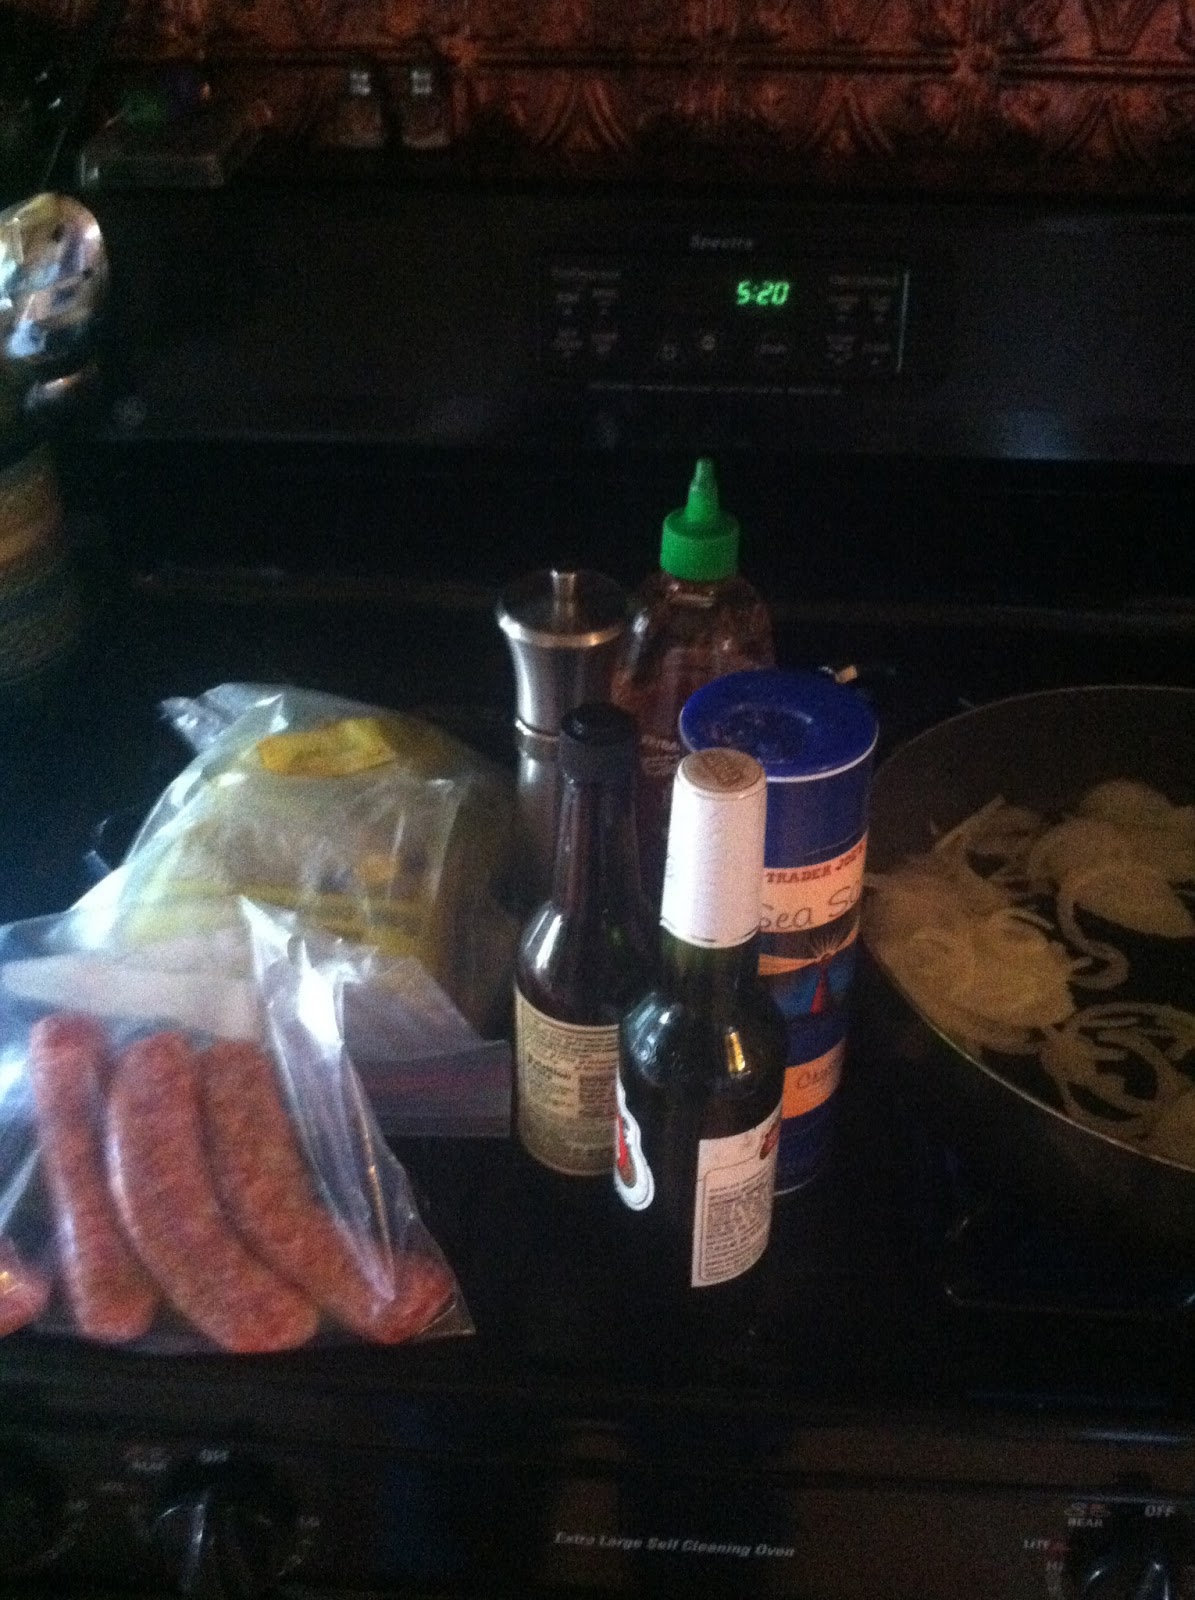
Beer braised sausage and onions

This is one of my husband's favorites.

Ingredients

  • 1 lb sausage (sweet or hot)
  • 1 large onion thinly sliced
  • 1 tsp oil (I always use olive oil)
  • 1 Tbsp brown 
  • 1 tsp salt
  • 1/2 tsp pepper
  • 1 tsp hot sauce (I used sriracha)
  • 1 tsp worchestershire
  • 1 beer (almost anything on hand is fine)


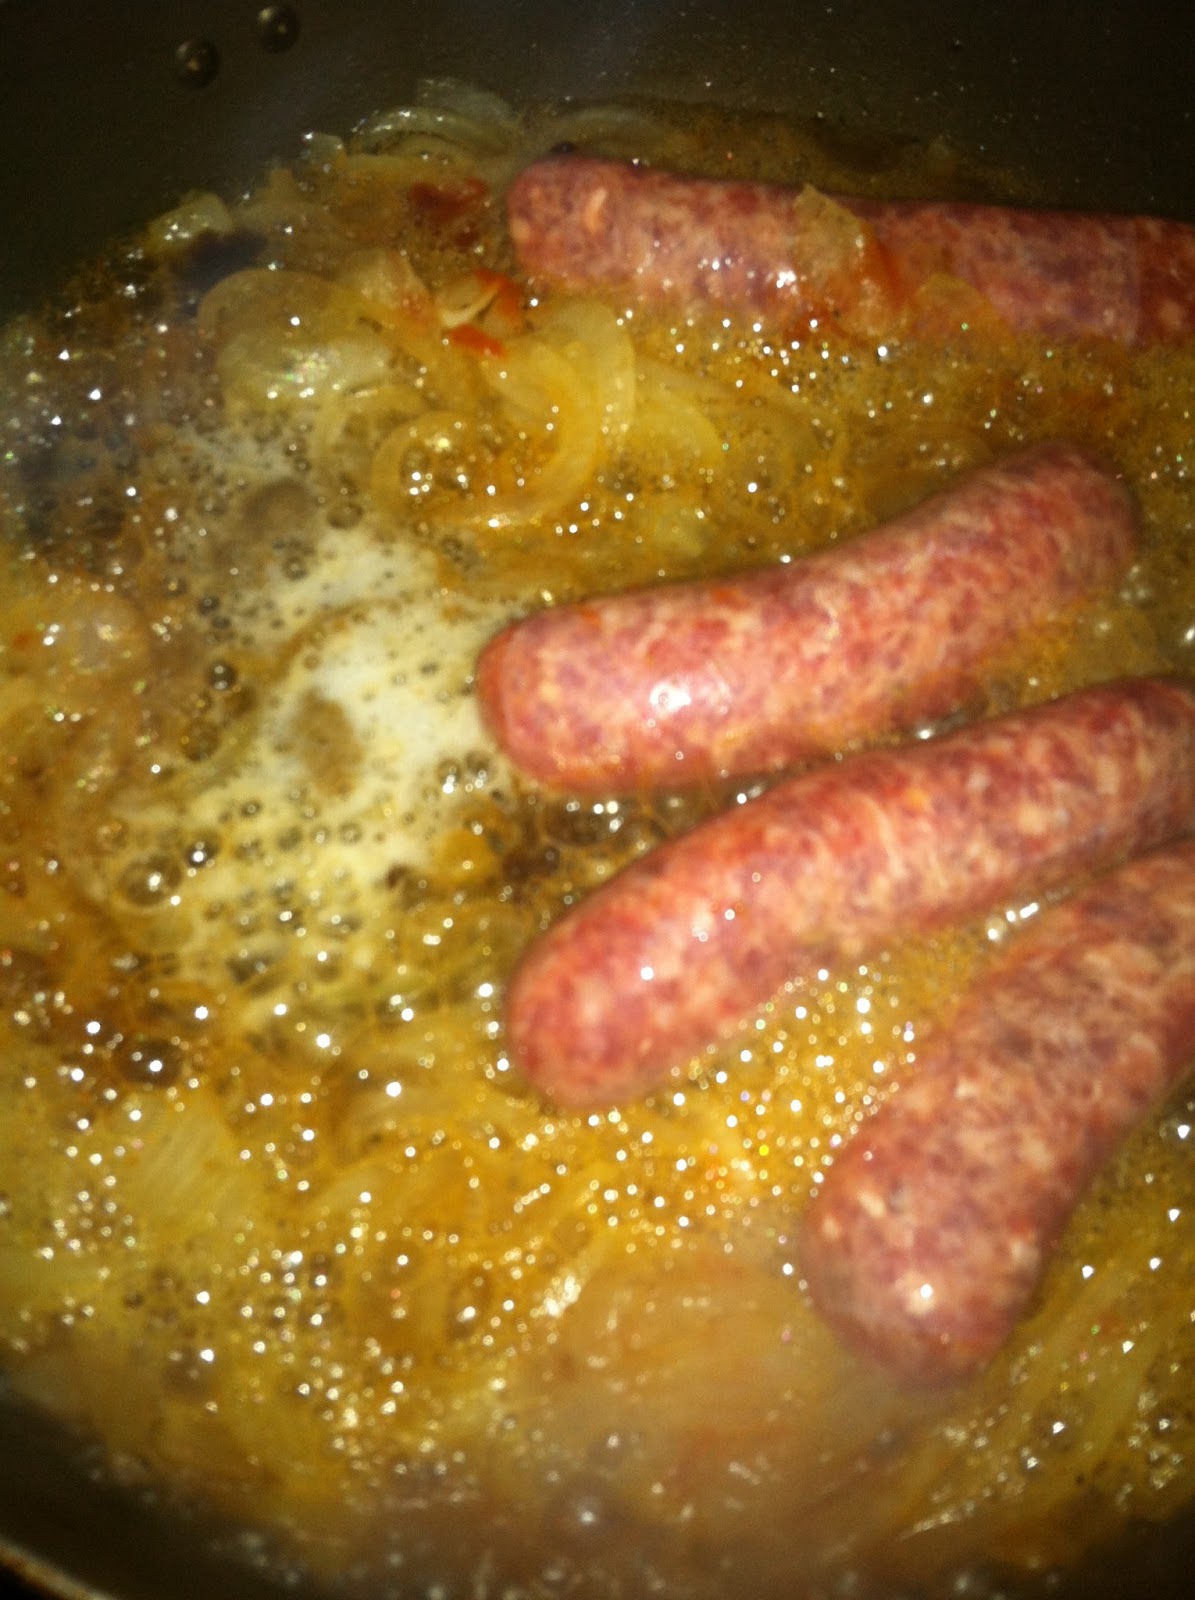
Heat the oil in a pan and add the onions.  Cook the onions until they are translucent and just starting to caramelize.  They should look something like below.


Add in the salt, pepper, brown sugar, worcestershire, hot sauce, and sausage.


Add the beer and stir it all together.


Cover and cook 20 minutes.  Turn sausage about half-way through.

After the 20 minutes, remove cover and let the whole thing reduce a bit (about 5 minutes).


Can serve over mashed potatoes or in a roll.  YUM.

Monday, May 13, 2013

Menu and more

Last weekend was jam packed full of stuff.  All fun.  All enjoyable.  All good.

But, I am thoroughly enjoying the fact that the only thing on my calendar today is some work, laundry, a bit of cleaning, a dentist appointment for my little guy, and dinner.

This week my husband is traveling. So, that means the little guy and I get to do some fun stuff just us....movie camp out in the family room, picnic dinner at a playground, etc.

Here is this week's menu.  If you need ideas, visit orgjunkie.com.


Monday
Sausages and onions braised in beer, baked potatoes, roasted broccoli

Tuesday – p.m. meeting and baseball
Packed sandwiches
Beet, orange, and goat cheese salad with honey lime dressing

Wednesday
Pasta Primavera (moved from last week – it was too hot to cook on Friday)

Thursday – Saturday (Husband away – make junk for dinner, order chinese, picnic)

Sunday
Chicken mole casserole (moved from last week…..forgot it was Mother’s day….and DUH…I was SO not cooking)


Monday, May 6, 2013

Monday - The Start of a New Week...and a new menu plan

Last week I overextended myself with over-volunteering.  I am reminding myself to start checking the rest of the week before committing to anything....even if THAT particular day looks clear.

I will be doing lots and lots of resting this week.....but first thing's first....I got my menu done.

Here's how my week is shaking out.....go to orgjunkie.com for ideas.


Monday

Tuesday
BBQ pork nachos – using leftover meat from yesterday

Wednesday – soccer practice followed by baseball game – packable dinner
Make black beans for Thursday
Sandwiches with cucumber salad

Thursday - Moms Night Out

Friday – at-home date night
Pasta primavera – asparagus and mushrooms

Saturday – party at neighbors
Hot onion dip and chips
Bbq meatballs
Make chicken for tomorrow in slow cooker

Sunday – baby V’s first birthday party
Chicken mole casserole (make ahead and put in the oven when we get home)


Saturday, May 4, 2013

Cinco de Mayo is coming

Tonight while pre-cooking something for Cinco de Mayo, I splashed some bean cooking liquid in my eye.  I put it on FB and a friend asked for the recipe.  So much for sympathy, right ??? ;)

But it got me to thinking.  The particular meal that I am making is one of my and my sweet husband's favorites.

A couple years ago, I combined a few things I'd come across and made one of the best meals I have ever eaten.....let alone cooked.  It was SO GOOD that I went into a food depression for a while.  I felt like I had created the best thing I was ever going to cook, so why bother with anything else.  It really had me bummed.

Luckily I have come across some other things that have also become my "best thing ever."  So, the food depression is over.

But, here is my Cinco de Mayo meal....started in advance.

BLACK BEANS
Originally, I found a recipe for Black Beans on Homesick Texan.  But, at this point, I have made enough changes that I almost consider it my own.

Here is how I make the black beans.

You will need:

  • 1 lb dried black beans
  • water
  • 1 large onion, chopped
  • 1 carrot, grated
  • 6 garlic cloves
  • 1 tbsp chipotle powder
  • 1 tbsp cumin.
  • 3 cups of low sodium chicken broth
  • 3 tbsp bbq sauce
  • 4 tbsp lime juice
  • 1 tsp salt


Take 1 lb of dried black beans.  Put them in a 2 qt or larger pot.  Cover them with water and cover the pot.  Bring to a boil and turn off, leaving them covered and on the burner.

After an hour, drain and rinse and they are ready to use.

In a pressure cooker, saute up 1 chopped onion in 1 tbsp of olive oil.  While that's cooking, grate 1 carrot.  Also, clean 6 cloves of garlic and run them through a garlic press.  After the onions start to caramelize a bit, add in the grated carrot and pressed garlic.  Cook for 2 minutes more.

Add in 1 tablespoon chipotle (1/2 tablespoon if you don't like spicy beans) and 1 tablespoon of cumin.  Saute for 1 more minute.

Add in 3 cups of low sodium chicken broth and the drained and rinsed beans.

Put lid on pressure cooker.  Lock in place.  Bring to pressure and cook for 10 minutes (maintaining pressure).

After 10 minutes, turn off. and let cook until pressure drops.  Add in bbq sauce, lime juice, and salt.  Cook uncovered for 30 minutes.  Mash about half of the beans and it's ready to serve.

BEER BRAISED PORK IN SLOW COOKER

Really simple.


  • pork roast
  • salt and pepper
  • splash of hot sauce
  • can of diced  green chiles
  • 12 oz bottle of beer
Put pork roast into slow cooker. 
Add salt and pepper to taste.  
Add splash of hot sauce.
Top with entire can of green chiles.
Pour beer over whole thing.
Cover and cook on low for at least 6 hours or high for 3.
Shred meat and serve.

HOMEMADE TORTILLA CHIPS

Preheat oven to 425.
Use pizza cutter or kitchen scissors to quarter tortillas.
Brush with olive oil.
Sprinkle with salt.
Bake at 425 for 9 minutes.


Wednesday, May 1, 2013

LETTUCE!!!!!!!!

This week is insane.  I am co-ordinating our elementary school's plant sale.  Orders were due yesterday....getting delivered tomorrow.  Last night someone found 4 orders that had been placed in the wrong bin.  This is currently my biggest fear and is giving me nightmares.  I am terrified that someone's order has been missed.

Luckily, we do business with a VERY local garden center.  And they have been awesome.  I got nothing but kindness and support....even though they had started gathering our order already.  There really are some major advantages to doing business with local mom and pop places.  REALLY.

In the WAY cool part of my day, I just found small lettuce sproutlets in my pallet garden.  I was so excited that my husband thought something major was wrong.

Sigh.

Here's my little babies!!!!!  You might have to look REALLY closely.


Monday, April 29, 2013

Rainy Days and Menu Plan Mondays

It's Monday.....and a very rainy one at that.  Go get some menu ideas at orgjunkie.com.


This week is simple because we are going away over the weekend to help family get the shore house ready.


Monday – baseball game (seemingly likely to get rained out)
Grilled pork and roasted corn and avocado salad

Tuesday
Chicken pad see ew

Wednesday – soccer practice
Spaghetti and meatballs

Thursday
Cook ham, make gyro marinade, roast beets, make salad dressing
Mushroom fritatta and carrot salad

Friday/Saturday/Sunday – help open house up
Pack ham and chicken gyros and roasted beet salad

Sunday, April 28, 2013

Lettuce pallet garden

So, somewhere in my travels, I saw this cool idea to use a pallet to grow things that don't need huge root systems.  One of the items I saw in a pallet was a lettuce garden.  I can't find the exact picture I have in my head that I saw.  It could have been in a website, or a book.  But, it looks something like this.....


So, I researched....like always. Found a variety of instructions.  Mentally compiled and decided to give it a go.

I used one of my donated pallets.  I checked to make sure there was no pressure treated stamp on it.  Don't want arsenic in the lettuce.

So, I put it where I want it to be...because there is NO WAY I am going to move a pallet full of dirt.


I used landscape fabric.  I unrolled it so that it draped on the ground and cut it 6 inches past.  Then I lined up the edges with the edges of the pallet...and started in with the staple gun.


Because the landscaping fabric didn't cover the entire half.  I had to repeat the process with the other side.


Then I turned it on its side and stapled the "extra" to the bottom to create an envelope.

I filled it from the top with dirt.  Then I planted the seeds.


I did the top left side with buttercrunch and the top right side with spinach.  Then the 1st row, I filled with a mesclun mix and the second row, with arugula.

I am planning on doing another planting in 2 weeks to keep the lettuce going in waves.  And I will probably put some herb seeds....maybe mint....in too.

Keeping my fingers crossed.


Monday, April 22, 2013

MPM !!!!!

This week I am taking it easy on me.  We have a crazy night time schedule this week.  My husband sweetly is allowing me to run around like I'm a single non-parent.

If you need ideas for menu planning, check out MPM on orgjunkie.com.


Monday gardening class
Italian Wedding Soup

Tuesday  - take friend’s daughter to mandatory 4H training class at 6:30
Roasted cauliflower soup and grilled cheese

Wednesday soccer from 5-6
Grilled chicken and grilled zucchini

Thursday Moms night out
Cheeseburger soup

Friday/SaturdayHusband and son away camping
NO NEED TO COOK!!!!!

Sunday
Breakfast for dinner – pancakes and sausage


Friday, April 19, 2013

Putting in my new garden - Part 4

Coming to the finish line on starting the garden.  And trust me, it felt like a race putting it in.

The first thing I did was find a local place to purchase hay and straw. I basically typed in "straw [ZIP code]" into google.  Then I called the two closest ones that came up.  The price was the same, so I picked the closest

I did some calculations to figure out how much hay and straw I'd need.  It was like revisiting high school all over.

To do 4 inches of hay or straw in a 80 square foot garden, I multiplied 1/3 x 80.  [4 inches is 1/3 of a foot....4/12=1/3]  That resulted in 26.6666 cubic feet.  I found information that said there were 7 cubic feet of straw in a bale of hay/straw.  Dividing 26.6666 by 7, I came up with 4 bales of hay and 4 bales of straw.  Just a tip......that is SOOOOO much more than I really needed.  What that number didn't take into account is that hay and straw bales are highly compacted and when you spread them out, it goes so much farther. I really only needed 1 bale.

Just for comedy's sake, here's my minivan after putting in 5 bales of hay and 5 bales of straw (4 of each for me and 1 of each for my best friend who is allergic to hay, so I did the transport).


And here is what my car looked like after they were removed.  It took me 2 hours to vacuum it out....even with covering the back area with a tarp. 1.I spent the rest of the afternoon picking the hay out of my hair and my bra.....lord knows how it got there.


Then I debated about where to get the compost/leaf mulch.  Our county has a free composting program.  Townships drop off their compost material, the county composts it, and it's free to pick up. From what I understand, most counties have something similar.

Doing the math (correctly this time), I wanted 8 inches of compost.....which is 2/3 of a foot deep.....I came up with 80x2/3 = 53 cubic feet.  I looked up how many cubic feet in a cubic yard and came up with 27.  Meaning I'd need 2 cubic yards (53/27=1.975).

To get 2-3 cubic yards of leaf mulch delivered from my township is $60.  To get the quantity I needed for free....using 5-gallon buckets, it would take me 8 trips of 30 minutes of driving time (15 minutes each way).  I decided to go with the $60. I'm all about saving a buck, but the gas for a total of 4 hours of driving time would be comparable to that...if not cost more.  So, I went to see the township, wrote the check and got my delivery date.

Here is the lovely delivered leaf mulch. You can see pieces of my broken down pallet in the background.

So, with the back wall built, and the blocks evened up to create the front wall and sides, we were now ready to go.....FINALLY!!!!!!

We took cardboard boxes that we had pulled from our recycling bin, ripped them into pieces with a box cutter, and laid it down covering the grass.  Then we used rolled newspaper under the edges where the cardboard didn't match up properly so the grass won't grow through. We put the cardboard under the edge of the concrete blocks so that I can use them for planting too.


Then we watered the whole thing to soak the cardboard so it would mat down and compost well.

Next came the hay.  We spread it out to a 4-inch depth....and watered it thoroughly.


After that, the beautiful leaf mulch.....I made my husband shovel, while I wheeled, dumped, and spread.  I filled in the holes in the concrete blocks.


Put down a soaker hose and topped it all off with straw.  And now it's ready to plant!!!!!!!!!

So....what Id I spend?????? $50 for the concrete blocks, $60 for the hay and straw (some of which I am now re-selling to friends at a huge discount....recouping about $30 of that), $60 for the compost/mulch, and $25 for the soaker hose (not a necessity, but sure will make life nice).

Grand total.....$165.  And almost all of that is a one-time expense.

Next year's costs will be almost nothing. The joy of this type of garden is that it's almost maintenance free.  Next year I will use my home-made compost and buy 1 bale of straw (which I will split with someone....lesson learned) for $7.


Thursday, April 18, 2013

Putting in my new garden - Part 3

The garden walls are up!!!! Now what to put in the middle?????????

Originally, I had thought I'd need to order a load of top soil and fertilize the h3ll out of it.

Once I started researching I then thought I'd go down the road that Mel had done in Square Foot Gardening....a mix of peat, compost, and vermiculite.  Then I tried to find vermiculite.  I found it.  But darn was it expensive.  Ordering online would have been $24 for 4 cubic feet....and I needed 7 times that......$168!!!!! ....Not including shipping. I found some relatively locally, calculated that I would have to drive a half-hour each way.....AND pay a total of $150 dollars just for the vermiculite.

I was a bit stymied because it had sounded like such a great and easy solution....but for me it was unaffordable and inconvenient

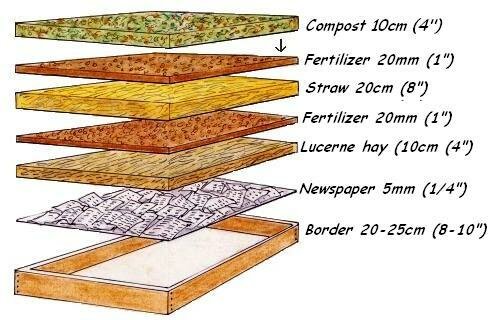
I kept researching other types of options.  I loved the ease of what SFG offered, but not the price.  My head was spinning with all the different information that was out there.  Then came the class at my local arboretum.  They talked about a lasagna garden....layers of "stuff" right on top of your existing yard to get good growing results.  It was the same ease as SFG, but had many more choices for the lasagna "filling."

This image is the same one that was used during the presentation


I questioned WHY the hay???? WHY the straw?????  WHAT type of fertilizer?????

The hay is basically straw with seed.  It is more nutrient rich.  As it decomposes, it releases a ton of good things for the garden to use.

The straw is to help keep moisture in.

The fertilizer could be almost anything....chemical fertilizer if you don't want an organic garden, peat moss if you do, etc.

What I finally decided to do was fairly simple. Cardboard, hay, leaf mulch, and straw.  Because the leaf mulch is so nutrient rich, I skipped the fertilizer.  I may add some next year and I will also have my bokashi composting to add.  But this year, I'm thinking I might be good.

The next step....gathering it all and putting it where it goes!!!!!